Python AI Agent Tutorial: Build Your First Agent
Learn how to build a Python-based AI agent from scratch with practical steps, code examples, and best practices for automating tasks.

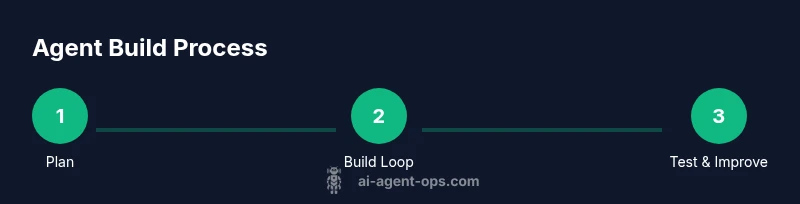
According to Ai Agent Ops, this Python AI agent tutorial shows you how to build a practical agent that plans tasks, calls tools, and adapts to outcomes. You’ll set up a virtual environment, install core libraries, and implement a simple agent loop that queries a language model, selects actions, and handles results. By the end, you’ll have a runnable, extensible example.
Overview: What is a Python AI agent?
In this python ai agent tutorial, we explore how software can plan tasks, call tools, and adapt to outcomes. An AI agent combines reasoning with actionable steps, bridging NLP with task automation. According to Ai Agent Ops, practical agent design starts with a clear objective, a compact decision loop, and safe access to tools. This section clarifies what distinguishes an AI agent from a scripted bot and why Python is a natural choice for rapid experimentation: Python is expressive, has a vast ecosystem, and runs on most platforms. We'll define essential components: objective, short-term memory (state), a set of tools, a prompt strategy, and a loop that decides what to do next. The goal is to produce an agent that can interpret user goals, select actions, and adjust its approach based on feedback. Later sections provide hands-on steps with code examples you can try today.
Prerequisites and setup
Before you start, ensure you have a clean workspace and a basic comfort level with Python. This section, influenced by Ai Agent Ops analysis, emphasizes planning, safety, and incremental experimentation. You will learn why starting small reduces complexity and how to scaffold your project for future extension. You should have Python 3.9 or newer installed, a preferred code editor, and access to an LLM API or a local model for testing. We’ll outline a minimal directory structure, explain environment isolation, and list essential libraries to install. The goal is to set non-negotiable basics so you can focus on the agent loop and tool integration without fighting configuration issues.
Step 1: Define the problem and capabilities
A successful Python AI agent starts with a precise objective. This step guides you to articulate the task, success criteria, and measurable constraints. You’ll draft a short natural language prompt that describes what the agent should accomplish and a list of tools it may call. Defining capabilities early helps avoid scope creep and informs the design of prompts, tool interfaces, and memory structure. Practical examples include a data-gathering agent, a monitoring assistant, or a task automation bot. Remember to include safety constraints and fallback behavior so the agent can handle unexpected outputs gracefully.
Step 2: Set up the environment and install libraries
Create a clean, repeatable environment and install the required libraries. You’ll typically start a virtual environment, activate it, and install core packages for HTTP requests, JSON handling, and LLM access. A minimal setup might include: creating a venv, activating it, and running pip install requests httpx pydantic. If you are using a cloud LLM, ensure you configure your API key securely. This step ensures your project is portable and ready for the agent loop and tool integration.
Step 3: Implement the agent loop
This section shows how to implement a simple agent loop that alternates between planning, acting, and observing results. You’ll create a lightweight class that encapsulates the state, calls the language model to plan the next action, executes that action through a tool interface, and updates its memory. The example remains intentionally small, focusing on the core loop rather than production-scale complexity. You’ll see how to build a robust interaction with prompts and a clean separation between reasoning and tool execution.
Step 4: Add tools and prompts
Tools are the actions the agent can perform (e.g., search, fetch data, or call an API). This section demonstrates how to define a simple tool interface and corresponding prompts that guide the agent’s behavior. You’ll learn to model tool calls as structured messages, maintain a registry of tool capabilities, and design prompts that encourage the agent to describe its plan before acting. Practical prompts help ensure the agent selects appropriate tools and handles errors gracefully.
Step 5: Test, debug, and iterate
Testing is essential to verify the agent behaves as intended. You’ll create deterministic test scenarios, capture the agent’s outputs, and compare them with expected results. This section covers common debugging patterns: logging decisions, stubbing tools, and using unit tests for individual components. Ai Agent Ops emphasizes iterative refinement—tuning prompts, adjusting tool interfaces, and constraining loops to prevent runaway actions.
Step 6: Deploy, monitor, and extend
When you’re ready, you can deploy your Python AI agent in a safe environment. This involves adding rudimentary monitoring, setting up error handling, and preparing for future tools or domains. You’ll learn how to version your agent, document its capabilities, and create a roadmap for adding more tools or memory layers. The result is a maintainable, extensible agent you can evolve with your project needs.
Best practices and safety for production agents
As agents move toward real-world tasks, consider safety, observability, and governance. Use bounded action scopes, rate limits, and clear exit conditions to avoid unbounded behavior. Implement thorough logging, structured prompts, and memory hygiene to prevent leaking sensitive data. Finally, plan for auditing and rollback in case the agent encounters problematic decisions.
Tools & Materials
- Python 3.9+(Use a consistent interpreter; ensure pip is up to date)
- Virtual environment tool (venv or conda)(Create isolated project environment)
- Code editor(Set up Python extension and linting)
- LLM access (cloud API or local model)(Obtain API key if using cloud-service)
- HTTP client library (requests or httpx)(Used for tool calls and API requests)
- Agent framework (optional, e.g., LangChain)(Helps orchestrate planning and tool calls but not mandatory)
- Prompt templates and tool descriptions(Predefined prompts for planning and tool calls)
- Testing data and logs(Use for debugging and improvement)
Steps
Estimated time: 60-120 minutes
- 1
Set up the project environment
Create a dedicated project directory, initialize a virtual environment, and install essential libraries. This step isolates dependencies and ensures reproducibility. Confirm you can import core modules without errors.
Tip: Use a requirements.txt or Pipfile to capture dependencies for future setups. - 2
Define the agent objective and capabilities
Write a clear objective and a list of supported actions or tools. This clarifies what success looks like and guides prompt design and decision making in the loop.
Tip: Limit the initial scope to a small set of tools to simplify debugging. - 3
Create the agent loop skeleton
Implement a minimal loop that can plan, act, and observe. Ensure the loop has a safe exit condition and basic logging to trace decisions.
Tip: Keep memory management simple at first; you can expand later with a proper memory store. - 4
Integrate tools and prompts
Add tool adapters and structured prompts that translate language model outputs into concrete actions. Validate that the tool calls return useful data.
Tip: Design prompts to elicit a concise, actionable plan from the model. - 5
Test, debug, and iterate
Run scenario-based tests and check for edge cases. Incrementally adjust prompts, tool interfaces, and error handling based on results.
Tip: Log decisions at each step to identify where the loop diverges. - 6
Prepare for growth and deployment
Add basic monitoring, safe guards, and documentation. Outline future tools to integrate and how to scale the agent responsibly.
Tip: Document decision boundaries to aid future audits and improvements.
Questions & Answers
What is a Python AI agent?
A Python AI agent is a software entity that uses reasoning to plan actions, calls external tools or APIs, and adapts its behavior based on outcomes. It combines language models with tool interfaces to accomplish tasks autonomously, within defined safety and scope.
An AI agent is a Python program that plans actions, calls tools, and adapts based on results.
Do I need a full framework like LangChain?
No. You can implement a simple agent loop from scratch, but frameworks can speed development and provide structure for memory and tool orchestration. Start small, then refactor into a framework if needed.
No framework is required to start; you can build a small loop and expand later.
What are common pitfalls when building AI agents?
Pitfalls include unbounded action loops, leaking sensitive data through prompts, vague prompts causing misinterpretation, and poor error handling. Planning, safety guards, and observability help mitigate these risks.
Watch for runaway loops, data leaks, and vague prompts; implement safeguards.
How can I test an AI agent effectively?
Use scenario-based tests with clear success criteria. Log decisions, mock tools during tests, and verify outputs against expected results. Incrementally refine prompts and tool interfaces.
Test with real-world scenarios and good logging to watch decisions.
Can I run an AI agent locally without cloud APIs?
Yes, with small local models or constrained environments. Cloud APIs often provide more capable models, but local options improve privacy and control.
You can run a simple agent locally with a small model if needed.
Watch Video
Key Takeaways
- Define a precise objective before coding.
- Build a simple, safe agent loop first.
- Model tools clearly and design prompts to guide actions.
- Test iteratively and monitor decisions for improvements.