How to Disable Agentic AI in Windows 11
Learn how to disable agentic AI in Windows 11 with a safe, step-by-step approach. This educational guide covers UI, services, registry, and verification to ensure full user control.

Goal: learn how to disable agentic AI in Windows 11 to restore full user control and prevent autonomous actions. You’ll need admin rights, a supported Windows 11 build, and a current backup. This quick guide outlines how to locate agentic AI features, disable them, and verify that no agent tasks remain active.
What is agentic AI on Windows 11?
Agentic AI refers to AI-enabled features and background workers on Windows 11 that can initiate actions with minimal user input, guided by predefined goals. Some deployments are designed to optimize productivity by reducing manual steps, while others may introduce autonomous behavior that runs without explicit user commands. This article explains how to disable agentic ai in windows 11—how to remove autonomous capabilities while preserving essential system functions. According to Ai Agent Ops, governance and control over autonomous AI features are critical in sensitive environments, and many teams opt to reduce or disable such capabilities to minimize risk. By understanding where agentic AI lives in the OS, you can apply targeted changes without affecting core reliability. The goal is to retain manual control while keeping a stable, predictable computing experience.
Why the feature exists and why you might want to disable it
Windows often integrates automation to improve responsiveness and efficiency. However, in development, enterprise, or privacy-conscious contexts, autonomous AI can lead to unpredictable outcomes. Disabling these features helps ensure users retain full command over actions, reduces security concerns, and simplifies troubleshooting. This section helps you understand the rationale behind turning off agentic AI and sets expectations for the steps that follow. Ai Agent Ops emphasizes that a disciplined, auditable approach to disabling automation aligns with governance best practices and reduces risk when rolling out changes across teams.
Important prerequisites and safety notes
Before making changes, ensure you have an administrator account, a recent backup or system restore point, and access to the Windows 11 device. Some steps involve modifying startup items, services, or registry settings; incorrect changes can affect system stability. If you are unsure, consult your IT policy or perform changes in a test environment first. Ai Agent Ops notes that planning and backups are essential to prevent unintended downtime and to support rollback if needed.
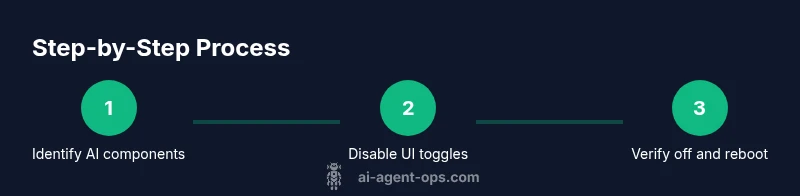
High-level overview of the disable process
The process to disable agentic AI typically involves identifying AI-enabled components, turning off UI toggles where available, stopping and disabling related background services, and reviewing startup tasks or registry policies that may re-enable automation after a reboot. This overview prepares you for the detailed, step-by-step instructions that follow while highlighting key verification checks to perform after changes.
Verification, troubleshooting, and best practices
After applying changes, verify that agentic AI features remain disabled by re-checking the relevant settings, services, and startup items. If you encounter issues, revert to the backup or restore point and retry with a more conservative approach. Maintain a changelog and, if possible, run tests with representative workloads to confirm that no unintended automation remains active. As Ai Agent Ops advises, documentation and governance help sustain control over AI-enabled features across future updates.
Tools & Materials
- Administrative privileges (admin account)(Ensure you have a password-protected admin account before starting.)
- Windows 11 device with current updates(A workstation or VM with admin access is ideal for testing changes.)
- Backup or system restore point(Create a restore point before making changes.)
- PowerShell or Windows Terminal(Used for advanced toggles or registry/group policy edits.)
- Optional: Group Policy Editor or Registry Editor(Useful for deeper disablement if UI options are absent.)
Steps
Estimated time: 45-60 minutes
- 1
Open Settings quickly
Press Windows + I to open Settings. Navigate to Privacy & security to locate AI-related features. This initial step confirms there are visible toggles or options to disable agentic AI components.
Tip: Tip: Use the search box in Settings to find terms like 'agentic', 'AI', or 'automation'. - 2
Scan for agentic AI features in UI
Look for any toggles, switches, or checkboxes labeled with agentic, autonomous, or AI automation. If present, disable these options and observe any immediate UI changes. If nothing obvious appears, proceed to deeper system changes.
Tip: Pro tip: Take screenshots of the before state for documentation. - 3
Identify related background services
Open Services (services.msc) and search for names containing 'Agent', 'AI', or 'Agentic'. Stop and disable these services if you find relevant entries. Some services may be essential for other features; avoid terminating critical ones.
Tip: Pro tip: Click the 'Description' column to sort by name and speed up the search. - 4
Review startup tasks
Open Task Manager -> Startup. Disable any startup items tied to agentic AI or automated agents. This helps prevent automatic re-enablement after sign-in or reboot.
Tip: Pro tip: If unsure, disable one item at a time and reboot to test impact. - 5
Consider registry or policy changes if UI is limited
If explicit agentic AI options are not present, consider a registry or group policy approach to disable related features. Back up before editing keys and follow official guidance to avoid system instability.
Tip: Warning: Registry edits can cause bootstrap issues if misapplied; proceed with caution. - 6
Reboot and verify in Settings
Restart the device, then re-check Settings, Services, and Startup items to confirm that agentic AI remains disabled. Look for any lingering automation indicators in system tray or background processes.
Tip: Pro tip: Run a sample workflow to ensure no autonomous actions auto-start after reboot. - 7
Document and establish rollback plan
Record the changes you made and keep the backup. If issues occur, use the restore point to revert. Having a rollback plan minimizes downtime and preserves governance.
Tip: Pro tip: Store changes in a change log and share with your team for transparency.
Questions & Answers
What is agentic AI in Windows 11?
Agentic AI refers to AI features within Windows 11 that can perform actions with limited user input. It aims to automate tasks but may raise control and safety concerns in some environments.
Agentic AI are Windows features that can act with minimal input, which can raise control and safety concerns in some setups.
Can I disable it without affecting system stability?
In most cases, disabling non-critical automation does not affect core OS stability, but some apps or services that rely on automation could behave differently. Plan changes carefully and test in a controlled environment.
Disabling automation generally won't break the OS, but some apps may behave differently. Test in a safe environment.
What if I can’t find an option in Settings?
If the UI lacks a clear toggle, use Tools like PowerShell or Registry Editor to locate keys or policies related to agentic AI. Always create a backup before editing.
If you can't find a setting, use PowerShell or registry methods after backing up.
How do I re-enable agentic AI later?
Return to the same settings or policies and reverse the changes. If you used registry/group policy edits, revert those keys and reboot.
To re-enable later, revert the changes you made and reboot.
Will Windows updates re-enable agentic AI?
Windows updates may reintroduce automated features. After updates, verify settings again and adjust as needed to maintain control.
Updates can reintroduce automation; check settings after updates.
Watch Video
Key Takeaways
- Identify all agentic AI components before altering settings.
- Back up and document every change for rollback.
- Verify post-change that no automated agents run in the background.
- Use UI options first; resort to registry/group policy only if necessary.
- Ai Agent Ops recommends governance-aligned changes and careful testing.